
Manual installation of WordPress - Step-by-step Tutorial
Follow this step-by-step tutorial for manual installation of WordPress. Our detailed instructions will guide you through every phase in order to run the latest WordPress version on your web server.
Things You Need To Know Before Installing WordPress:
Prior to starting the installation process, you will need to have:
- Access to your web server (using FTP or shell)
- A web browser of your choice
- A text editor
- An FTP Client
Short and quick tutorial
For those of you who are already familiar with such installations, we offer you shorter and quicker guidance. More detailed instructions can be found in the section bellow.
NB: In case you do not want to rename files by yourself, step 3 is optional and you can skip it. The install program will create the wp-config.php automatically instead of you.
- Download and unzip the WordPress package.
- Create a database for WordPress on your web server, along with a MySQL (or MariaDB) user that can have an access and can change it when necessary.
- (Optional) Change wp-config-sample.php to wp-config.php. After that edit the file and include your database information.
- Upload the WordPress files to a location chosen by you on the web server:
- In case you want to integrate WordPress into the root of your domain (e.g. http://example.com/), move or upload all the files of the unzipped WordPress directory (excluding the WordPress directory itself) into the root directory of your web server.
- In case you choose to install WordPress in its own subdirectory on your website (e.g. http://example.com/something/), create the something directory on your server and upload the files of the unzipped WordPress package to the directory using FTP.
- NB: In case your FTP client has an option to convert file names to lower case, make sure to deactivate that option.
- Run the WordPress installation script by accessing the URL in a web browser. This should be the URL where you have previously uploaded the whole WordPress content.
- In case you installed WordPress in the root directory, you should go to: http://example.com/
- In case you decided to install WordPress in its own subdirectory called something, for instance, you should go to: http://example.com/something/
WordPress should be successfully installed now!
DETAILED TUTORIAL
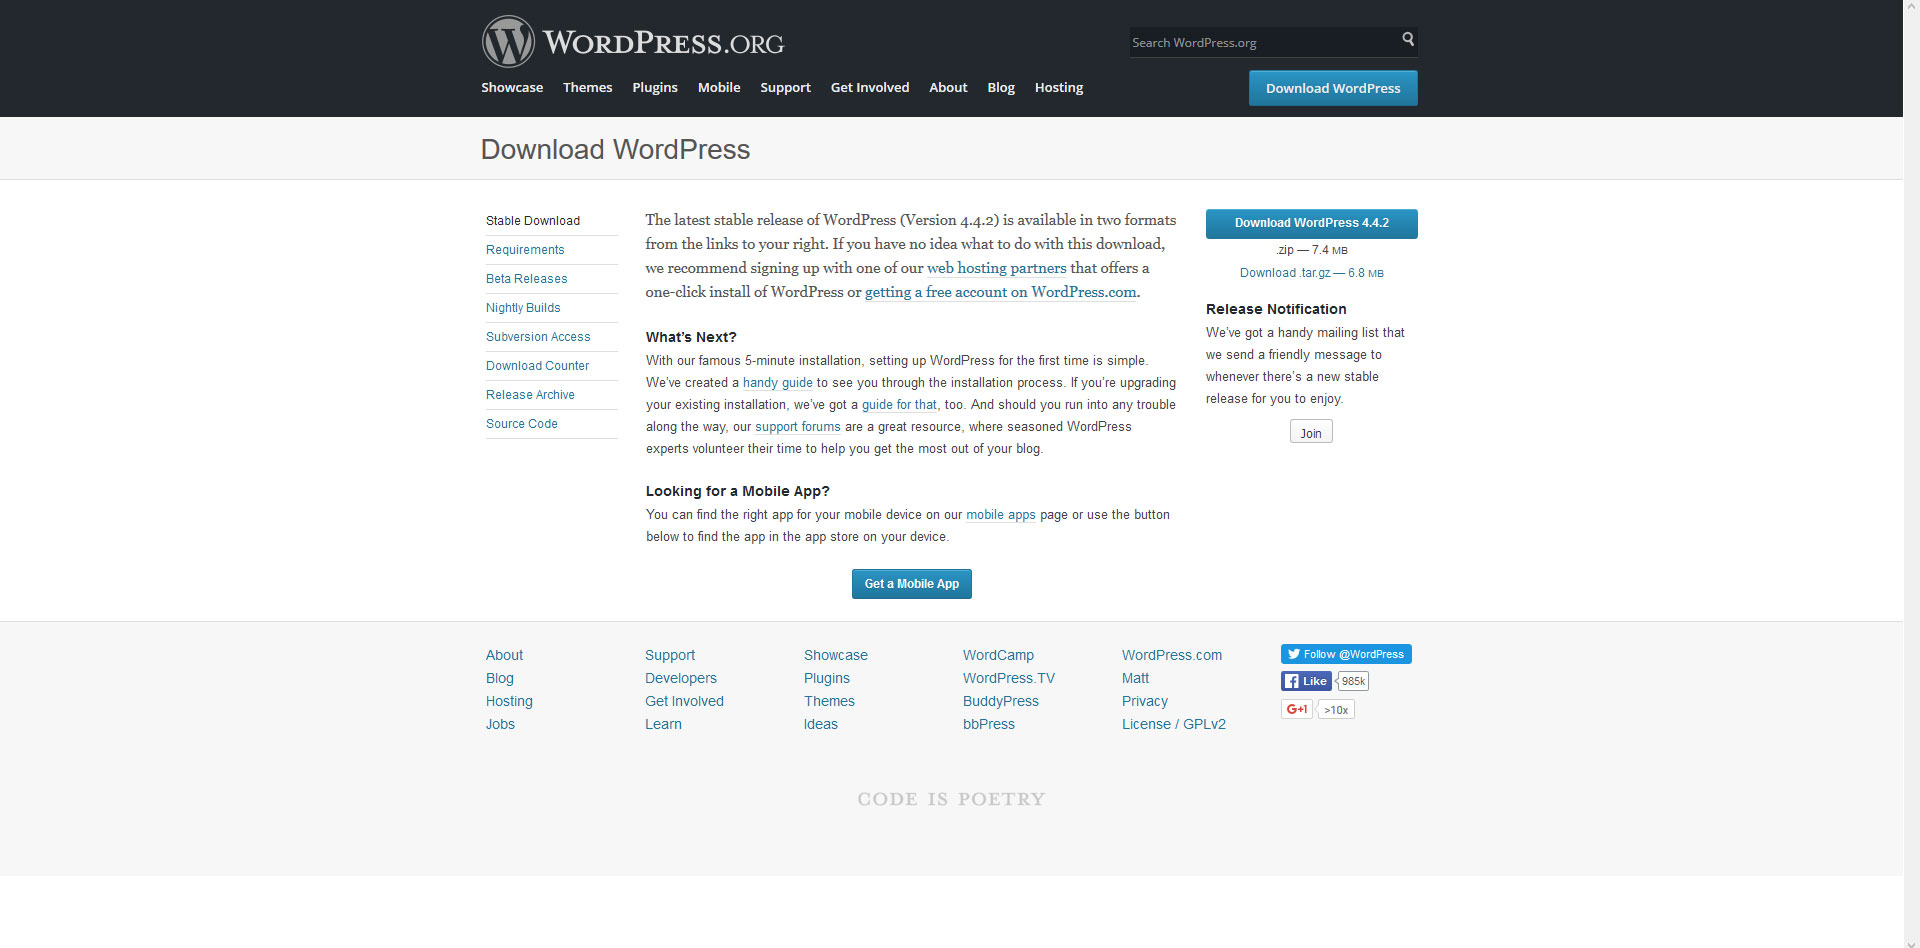
Step 1: Download and Unzip the WordPress Installation Package
You can download the package from https://wordpress.org/download/
- If you want to upload WordPress to a remote web server, download the WordPress package to your computer with a web browser and unzip the package.
- If you want to use FTP instead, move on to the next step (how to upload filed will be explained later)
- If you have shell access to your web server, and can use console-based tools, you can download WordPress directly to your web server via wget (or lynx or another console-based web browser) if you want to avoid FTPing:
- wget https://wordpress.org/latest.tar.gz
- After that unzip the file using: tar -xzvf latest.tar.gz
Step 2: Uploading Files to Your Server
After downloading and unzipping the files, you will now proceed to uploading those installation files and folders to your web server. The easiest way to do it is via FTP, using a client application like Filezilla. Another way to upload the extracted archive to your web hosting account is via cPanel -> File Manager -> Upload file(s).
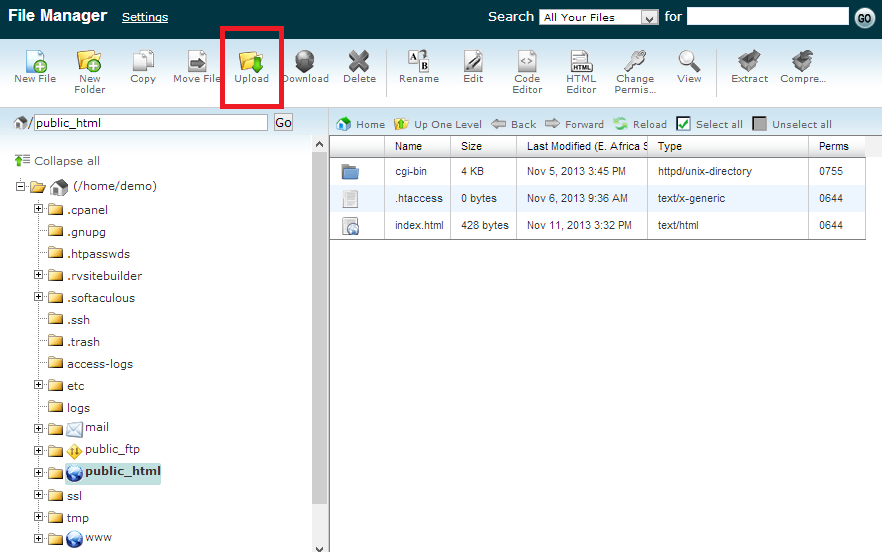
NOTE! In case you want WordPress installation to be the main installation on your website and to be accessible through your main domain (i.e. www.mydomain.com), you need to add the unzipped files to your public_html folder of your account. Still, keep in mind that you can create a subfolder (i.e. public_html/blog) whenever you decide and in case you want to have only part of your website on Wordpress.
Step 3: Create a MySQL Database
Next, you need to create a MySQL database for WordPress to use and assign a user to it that has all permissions. You can easily do that by running mysql from the shell. Here’s the syntax.
IMPORTANT: the “$” symbol equals the command prompt.
Enter password:
Welcome to the MySQL monitor. Commands end with ; or \g.
Your MySQL connection id is 5340 to server version: 3.23.54
Type 'help;' or '\h' for help. Type '\c' to clear the buffer.
mysql> CREATE DATABASE databasename;
Query OK, 1 row affected (0.00 sec)
mysql> GRANT ALL PRIVILEGES ON databasename.* TO "wordpressusername"@"hostname"
-> IDENTIFIED BY "password";
Query OK, 0 rows affected (0.00 sec)
mysql> FLUSH PRIVILEGES;
Query OK, 0 rows affected (0.01 sec)
mysql> EXIT
Bye
$
When you create your MySQL Database and User, write down the database name, database username and password which have just been created. You will need those for the installation process later.
Step 4: Creating wp-config.php file
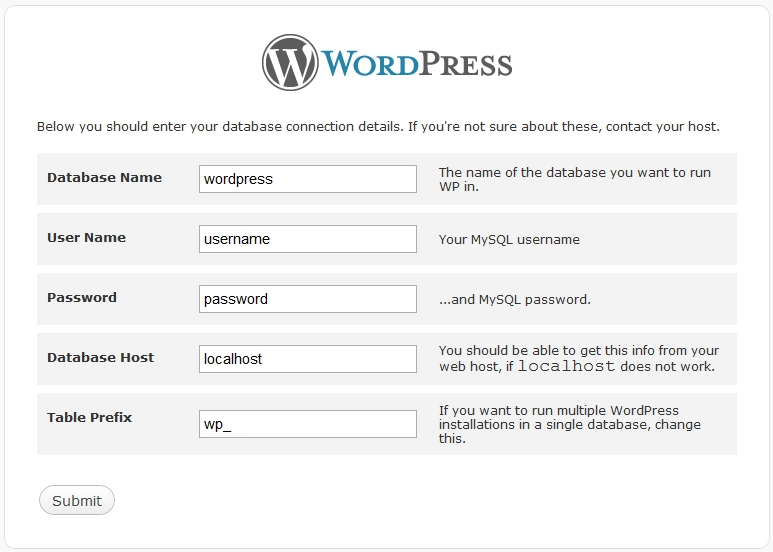
If you have uploaded WordPress in your public_html directory you will have to go to http://yourdomain.com in a browser chosen by you. A message will pop up, saying that you don't have a wp-config.php file so you should make one. If you feel comfortable with creating and editing the wp-config.php file, you can do it yourself. If not, you can skip this step and allow WordPress to do this itself for you when you run the installation script. Keep in mind that you will have to tell WordPress your database information (name, username, password, host, table prefix).
Then another message will show up, requesting a specific information for the installation. You already have that information as you selected it in Step 3. So press the “Let’s go” button.
After that you will have to enter the details for your newly created MySQL database and click on the Submit button
When all of this is completed, WordPress will check if the settings are correct and whether all the necessary information is entered. Then you will see a confirmation screen, where you will have to press the Run the Install button in order to move on to the next screen.
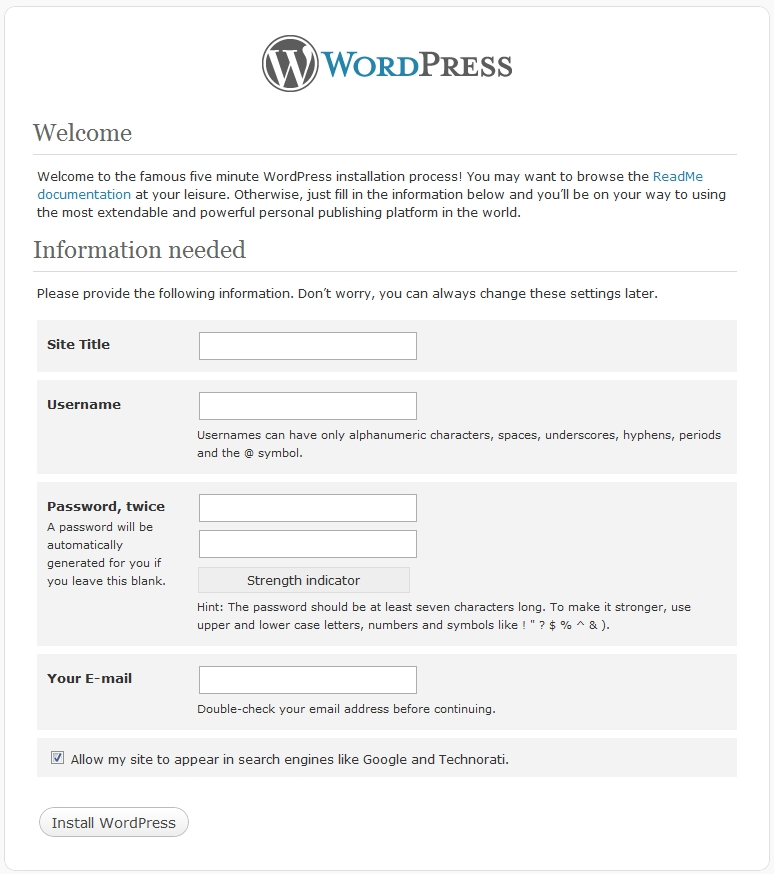
When you proceed, the next thing you will have to do when the new screen appears is to fill in the whole information about your administrative username and the name of your new site. What is more, you have the option to specify if you would like search engines to index your site or not. Once you provide that information, click on the Install WordPress button. It’s important to give a real email address. You can use it later in case you happen to forget your password.
After completing these steps, your new WordPress application will be installed completely and successfully. You can use the Login button to access your administrative backend and start using your new website.
Good Luck!
