
How to: Connecting Windows Device to OpenVPN Access Server
In this guide we will show you all the steps for connecting your Windows device to your new OpenVPN Access server. It takes just a couple of clicks and you will be all set up and able to use your new server.
Let’s get started.
What is OpenVPN Server
This is an open-source solution for creating a secure virtual private network (VPN) over the Internet. An OpenVPN server then is a server that is installed with OpenVPN software, enabling remote clients to establish a VPN connection quickly, easily, and without any risks of data breaches.
BGOcloud OpenVPN Server In Brief
At BGOcloud we offer a robust, highly configurable, and super easy-to-use OpenVPN service that encrypts your Internet traffic and protects it from cyber-attacks or any threats to your data. You get your own server and a secure connection to remote clients or network resources.
Connecting Windows Device to OpenVPN Access Server
If you prefer want to watch a video tutorial, you can watch this one from our Youtube channel:
Step 1: Accepting the Self-Signed Certificate For The OpenVPN CWS
After you buy your OpenVPN server, go to https://<your OpenVPN Access Server IP>. You can see your IP in the e-mail we have sent you or in the client area. It will display a self-signed certificate warning. Your server generates a self-signed certificate specially for itself. Just click on “Advanced” and then on “Continue to … (unsafe)” or “Proceed to … (unsafe)” to access your OpenVPN server.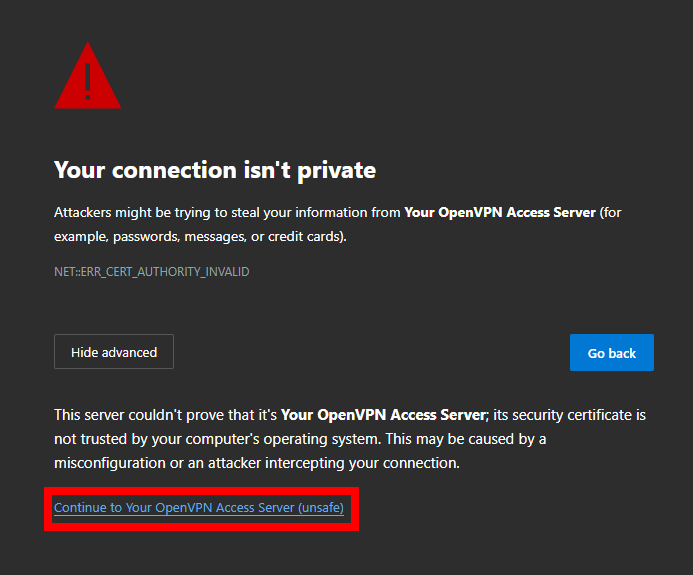
Step 2: Credentials
Then enter your credentials. For a new OpenVPN Access server, the username is openvpn and the password is your VPS root password. You can find them in the E-mail you received from us.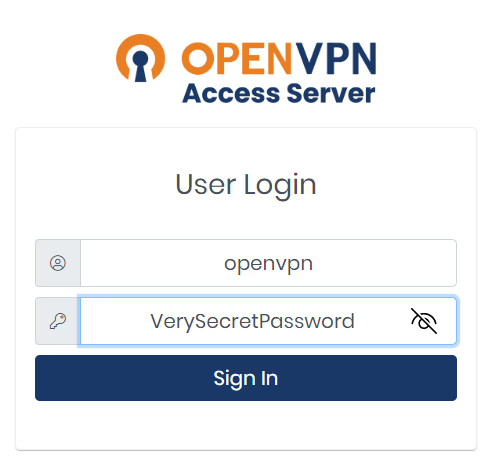
Step 3: Downloading The OpenVPN Server Client
You will be presented with clients for most OS.
If you have already installed OpenVPN Connect client on your PC, you can just download your profile and import it. To do this, scroll down, click on “Yourself (user-locked profile)” and skip to step 6.
If you haven't installed OpenVPN Connect client, click on the windows icon with "NEW" badge to start downloading it for your OS.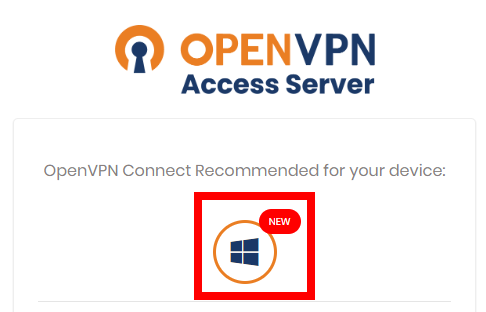
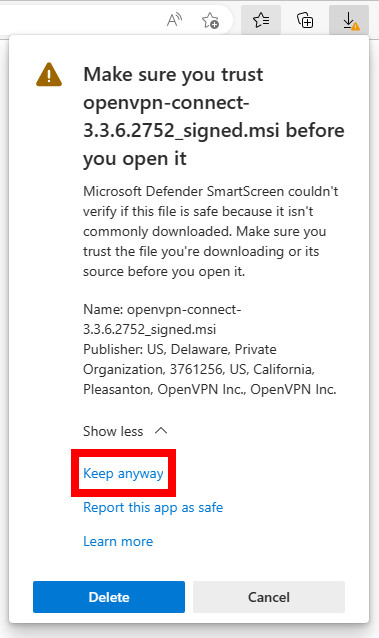
Since it comes from your server, you might get a warning for a potentially dangerous file. This happens mostly in Microsoft Edge. Depending on the used browser click on “Keep” or click on the three dots, then on “Keep”, then on “Show more” and lastly on “Keep anyway”.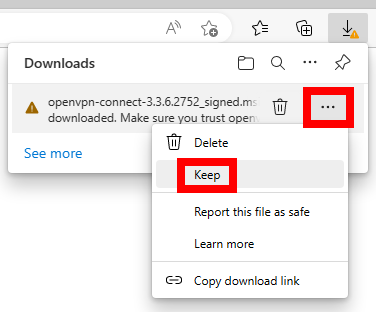
Step 4: Running The Installer for Windows
Now run the installer. You will get a warning from Microsoft Defender SmartScreen since it’s coming unsigned from untrusted server. Click on “More Info” and then on “Run Anyway” to run the installer.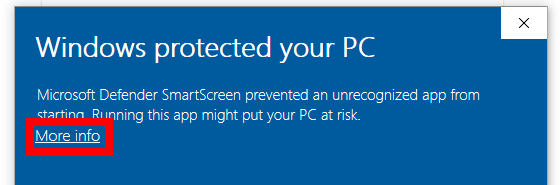

Step 5: Configuring a Profile
After the installation is complete, the OpenVPN Connect client is automatically opened. Skip the Welcome screen and you will see that the VPN profile for your OpenVPN server is already configured. Click on the switch next to it.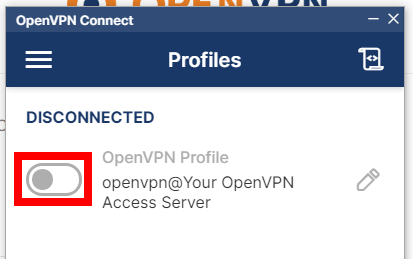
Then enter the password for the user.
And that’s it. You have successfully established a full traffic redirect to your new OpenVPN server.
Step 6: Importing new profiles in the OpenVPN Connect Client
You can import other profiles from other OpenVPN servers in this client. To import a new profile, just double-click on your .ovpn file, or drag it to the program like shown below.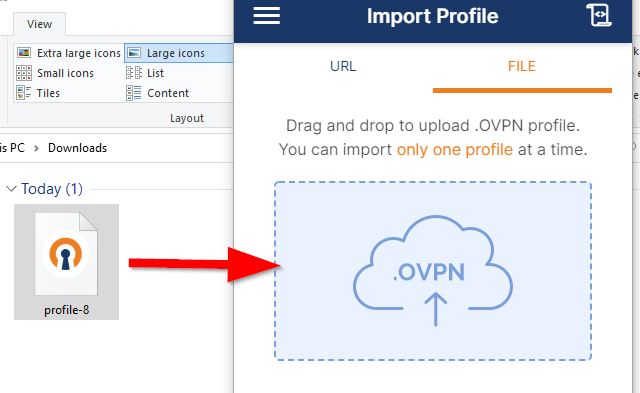
If you like, you can change the profile name and save the user’s password, before importing the profile. Click on “Connect”.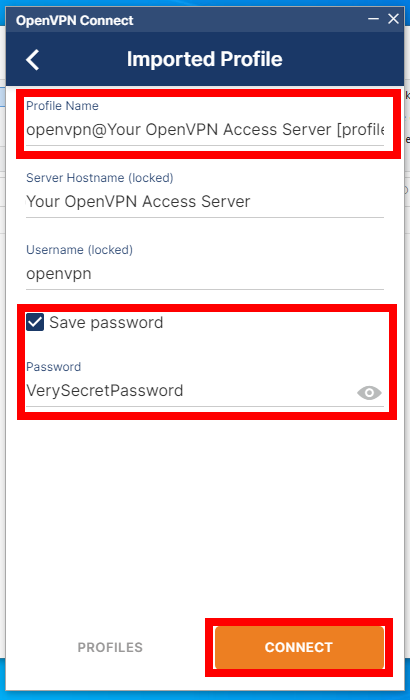
If you have chosen not to save your password, enter it when prompted.
You can later access and control all OpenVPN connections from the OpenVPN icon at the taskbar.![]()
We have prepared quick guides for the other OS too that can be found there:
Connecting Linux to OpenVPN Access Server via APT
Connecting macOS devices to OpenVPN Access Server
Connecting Android phones to OpenVPN Access Server
Connecting iPhone to OpenVPN Access Server
Take a look at our fast and secure OpenVPN Hosting and choose the appropriate plan for your needs.