
Set up OpenVPN Client in MacOS
In this article, we will show you how to connect your MacBooks and Macs to your OpenVPN Server. We have already set up an OpenVPN server in this article.
IMPORTANT: The date on the router must be within the range of the installed certificates valid period. To prevent certificate verification issues, enable NTP synchronization on both the server and the client.
Here's a small video explaining the process:
First, download the OpenVPN Connect Client, officially maintained by OpenVPN. - https://openvpn.net/client/
When you open the PKG file, you will be asked which version would you like to use. Choose the package for your CPU.
OpenVPN Mac client with Intel or Apple Silicon chip.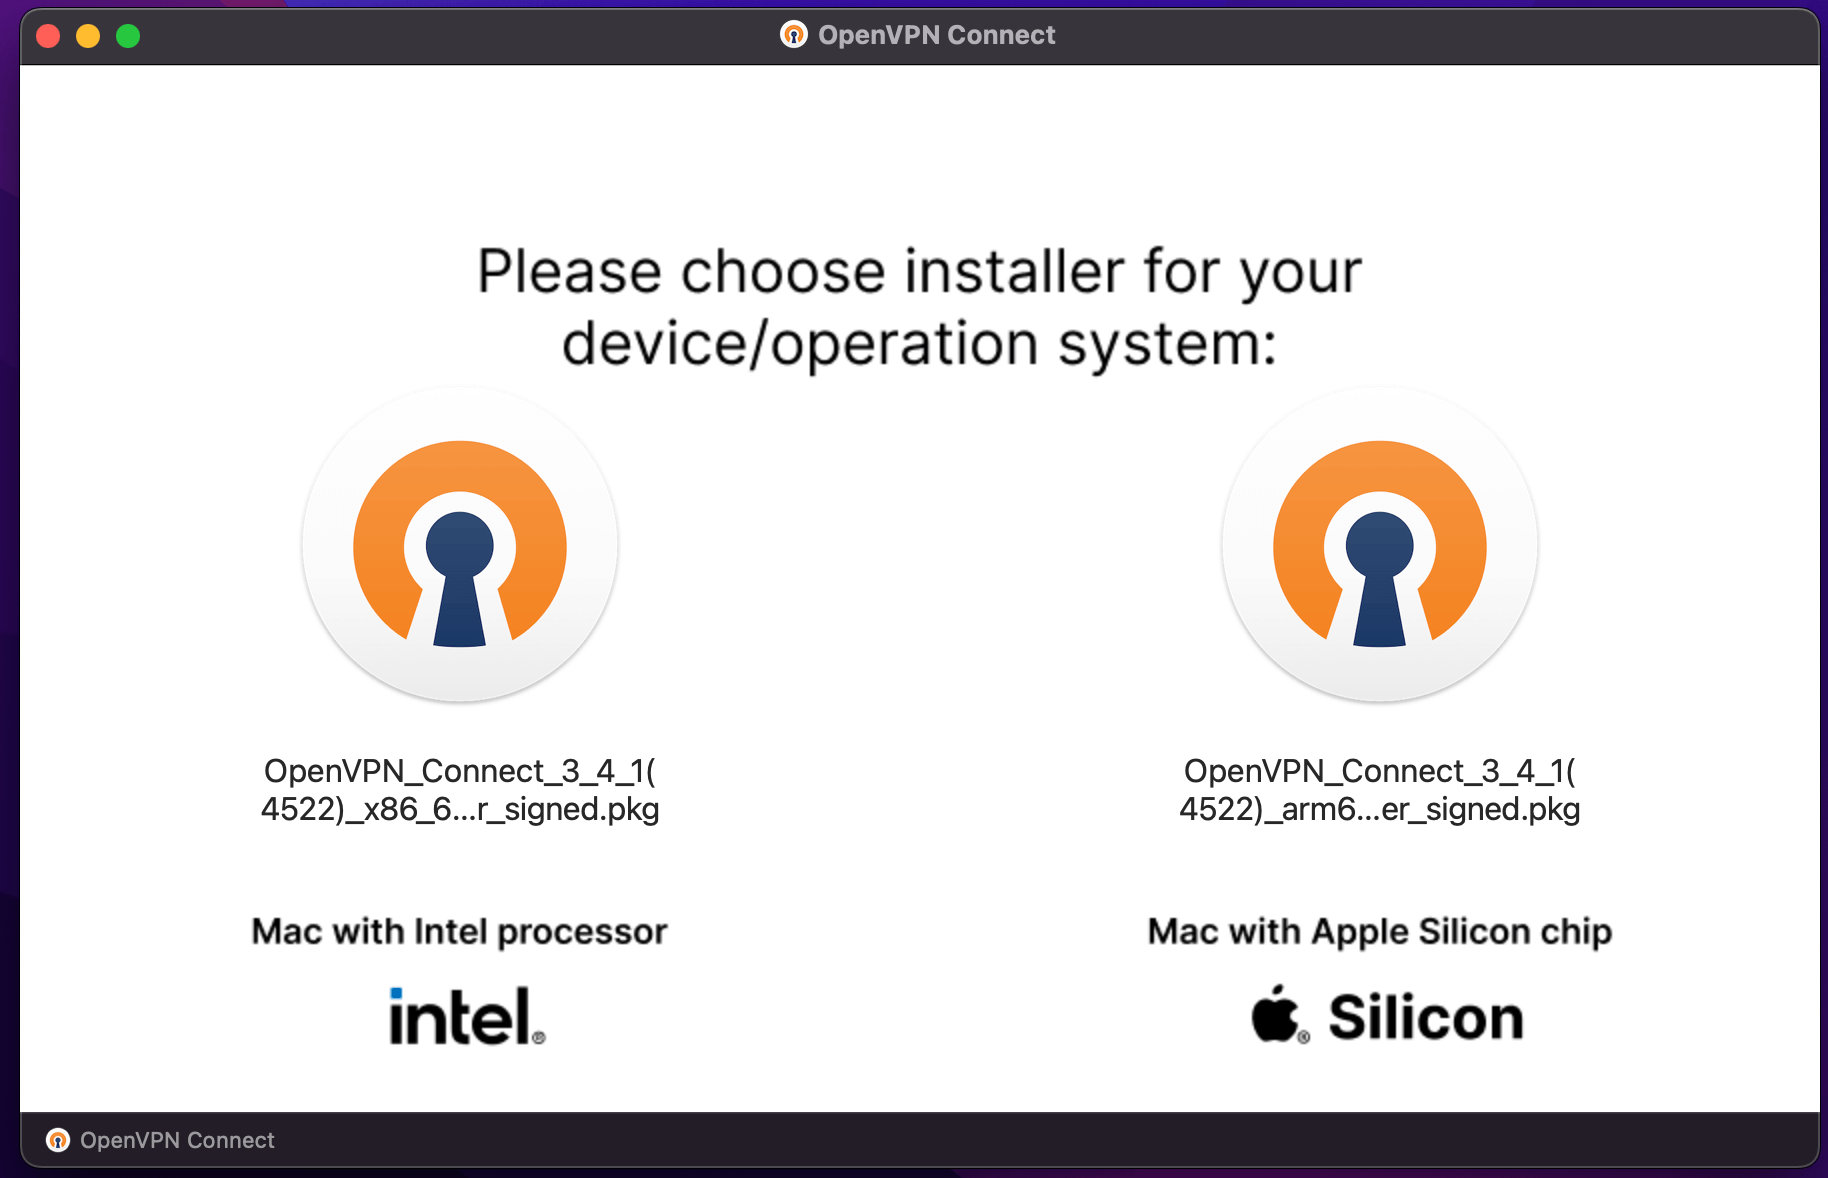
After you've installed the client, you need to prepare all these files in a folder:
- the CA certificate (.crt)
- the Client certificate (.crt)
- the Client certificate key (.key)
- the configuration file (.ovpn)
- a file, named secret, containing the VPN username and password
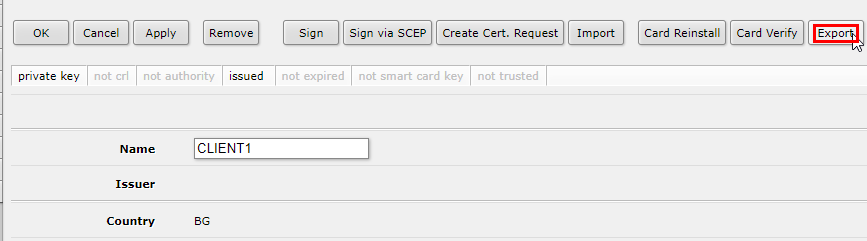
Log in to your Mikrotik CHR and then go to System>Certificates. We'll export the Client certificate first by clicking on it and then clicking on Export.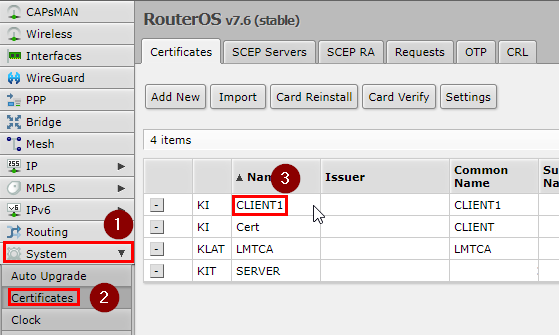
Enter a passphrase of your choice and click on "Export". You will get a key file with your Client certificate. 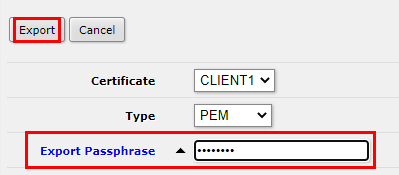
RouterOS Command:
[admin@MikroTik] > /certificate export-certificate CLIENT1 export-passphrase=12345678
Then export the CA certificate without a passphrase.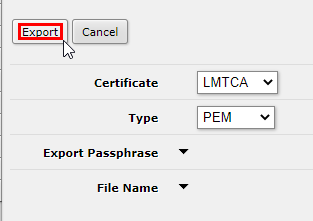
RouterOS Command:
[admin@MikroTik] > /certificate export-certificate LMTCA export-passphrase=""
Click on Files on the side menu. Then click on the Download button next to the certificates and the key to download them. 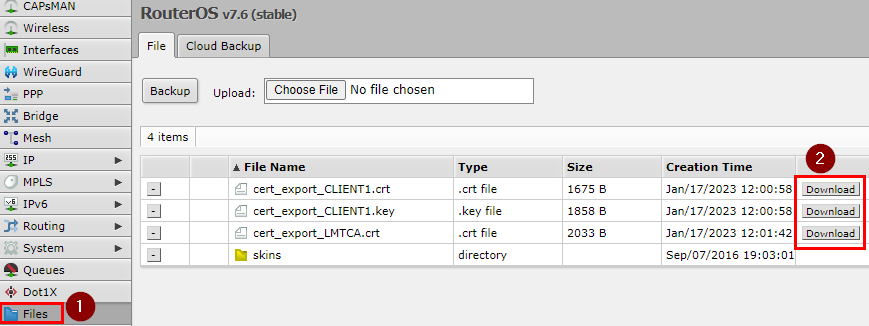
Now we will create the secret file. In a text editor enter your VPN username on the first line and the password on the second line. Save it as secret.
Example secret file:
BGOcloud VPN
P@ssworD!#
The last file we need to create is the OpenVPN configuration. In a text editor paste this example configuration, change the values according to your OpenVPN Server configuration and save it.
Example .OVPN configuration file:
client
dev tun
proto tcp-client
remote IP address of your Mikrotik CHR
port 1194
nobind
persist-key
persist-tun
tls-client
remote-cert-tls server
ca LMTCA.crt #CA certificate file
cert CLIENT1.crt #CLIENT certificate file
key CLIENT1.key #CLIENT certificate key
verb 4
mute 10
cipher AES-256-CBC
data-ciphers AES-256-CBC
auth SHA1
auth-user-pass secret #File with user/password for VPN
auth-nocache
;redirect-gateway def1 #remove semicolon for full redirect
Put all the needed files in a folder and start the OpenVPN Connect client. Click on FILE and drag the .ovpn configuration file to it.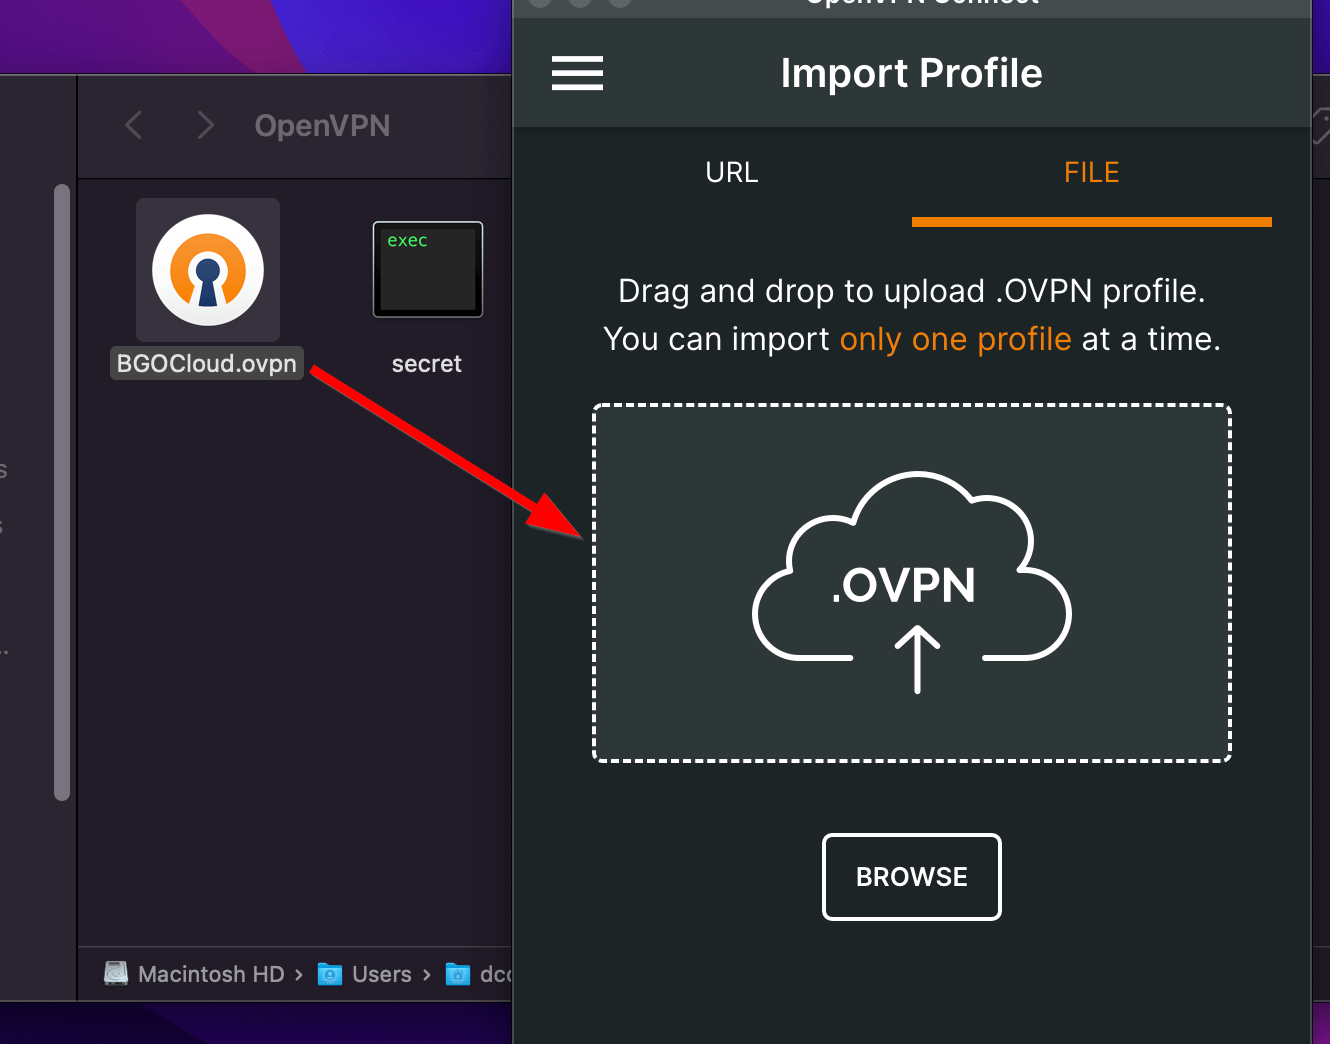
Then confirm that everything is correct. Name the profile as you like and if you plan to connect to the server automatically, check Save Private Key Password and enter the passphrase you've set. Then click on “Connect” to test your connection.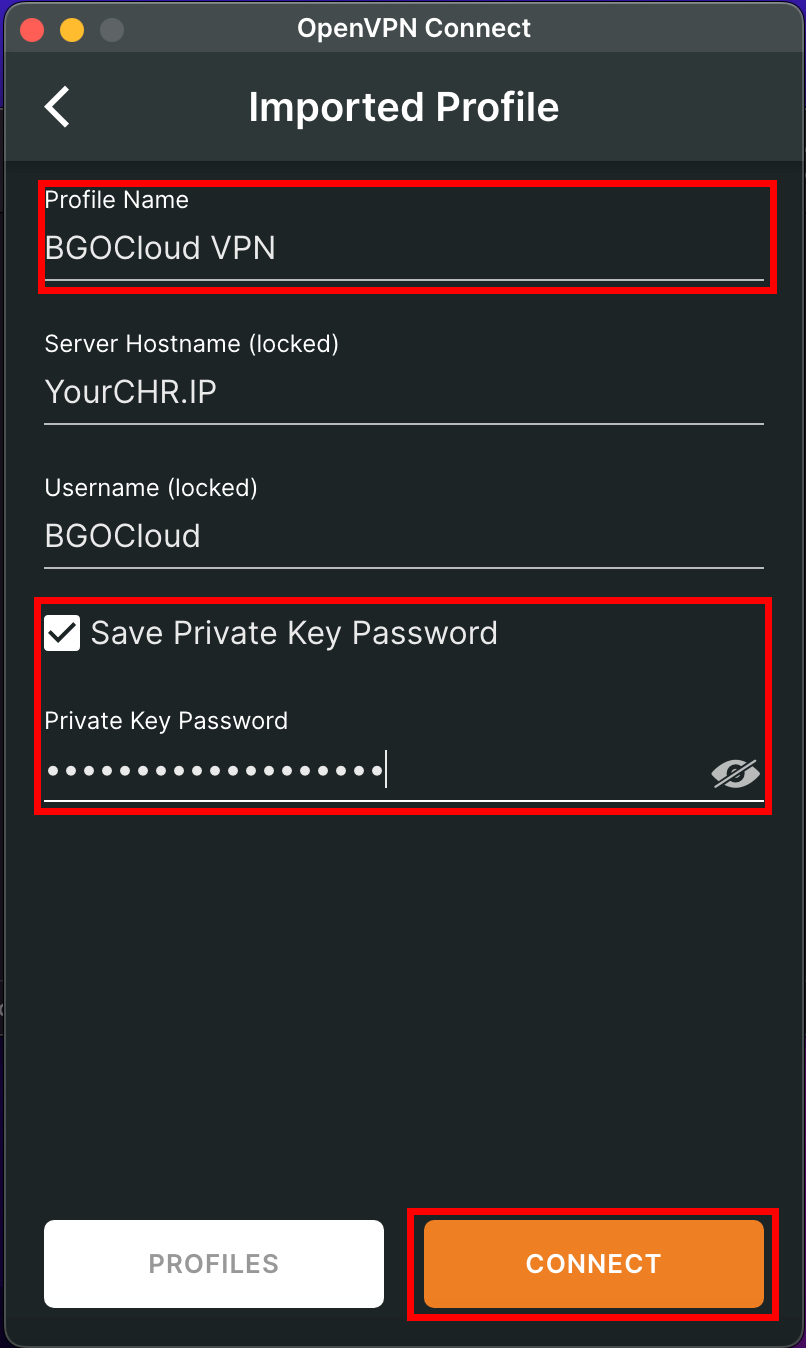
And that’s it. Now you have a secure VPN connection to your network. 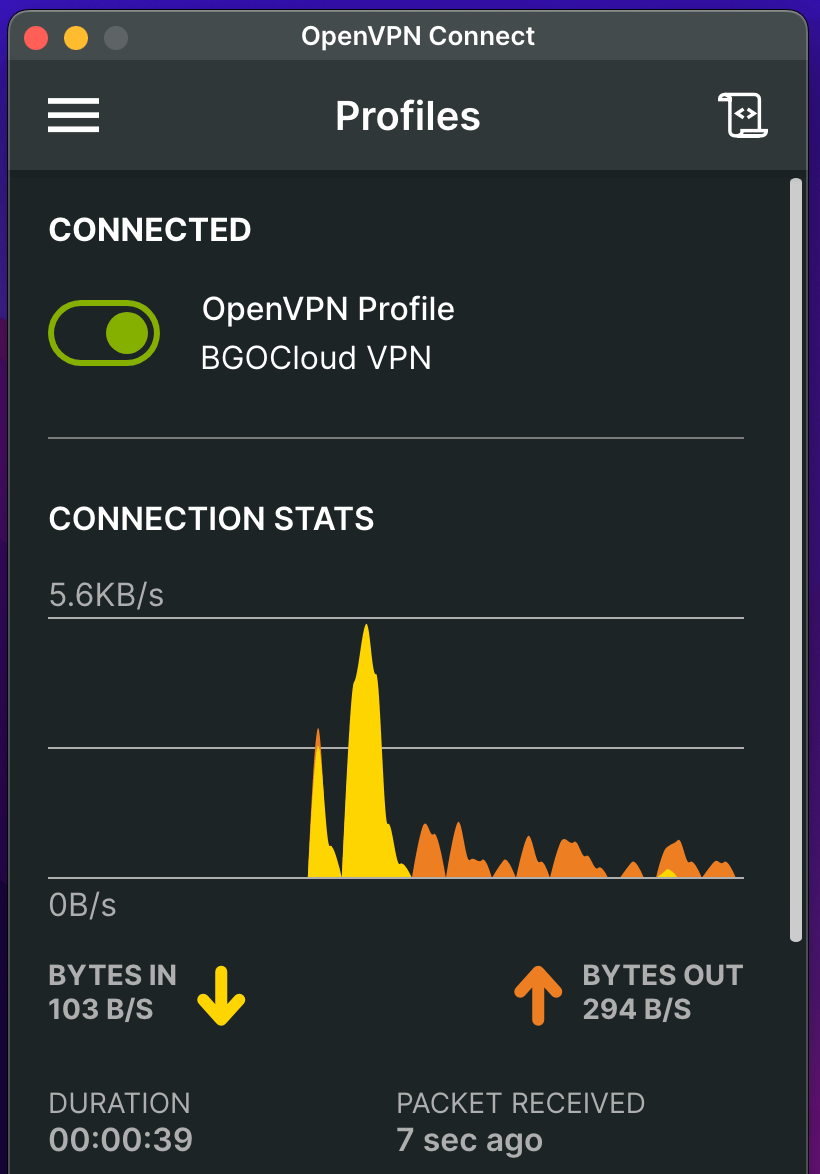
To make it even more secure, remove the semicolon from the redirect-gateway line in your .ovpn file and reimport the profile.
...
auth SHA1
auth-user-pass secret #File with user/password for VPN
auth-nocache
redirect-gateway def1 #remove semicolon for full redirect
You can later access and control it from the icon at the taskbar.![]()
Check our powerful Mikrotik Cloud Hosted routers
If this is hard for you, you can take a look at our fast and secure OpenVPN Hosting plans. Easier and quicker to set up, more secure and it's ready in 5 minutes.