
How-To: Installing & Using Docker Container and Pihole / Adguard Home in MikroTik CHR
As of the latest exciting news around MikroTik and their fresh release of the docker container in MikroTik, you may have heard that adding docker to RouterOS brings some interesting possibilities. Like managing some micro services on a web level. But the question now is how to install it and use the latest addition?
This hands-on tutorial will show you the steps and the proper way for installing docker and Pi-hole.
What Is MikroTik Container
In brief, using container in MikroTik is the implementation of Linux containers that enable users to run containerized environments within MikroTik Router Operating System. One important thing to know is that you must use a trusted hosting service provider, otherwise if your MikroTik CHR is compromised in any way, containers become an easy way for cyber attackers who want to install malicious software in the router and over your network.
Hands-on: What Is Pi-hole And How To Use Pi-hole With MikroTik Router
Pi-hole is a DNS based adblocker. It can block all ads in all your devices in your network. Since RouterOS v7.5, you can integrate it in your MikroTik router. This tutorial is for all ARM, ARM64 and x86 based MikroTik devices.
What about older MikroTik routers, or routers with different CPU architecture?
It is still possible to block ads with those routers as well. If your device has enough RAM and it is upgraded to RouterOS v7.15. you can use the AdList function instead.
Hands-on: What is AdGuard Home, and how to install it
AdGuard home is a DNS based adblocker and it can block advertisements on your network just like Pi-hole. It provides even more features, like Parental Control, Service blocking(e.g. blocking certain popular social media, shops, streaming platform etc.), and also protection from malware websites.
You can run docker containers in our Cloud Hosted Routers as well. Docker works in our Standard, Licensed and Dedicated MikroTik server plans. Choose the appropriate plan for your needs.
You can also watch our video guide (applies to Pi-hole installation):
1. Preparing the CHR for Docker Containerization
In this tutorial, our Docker subnet will be 192.168.34.0/24
- Update your router to the latest version of RouterOS. You can do it from System>Packages>”Check for updates”. Then download the latest version and install it.
- Make sure that your router is secured. If hackers gain access to your MikroTik CHR, they can make malicious docker containers.
- Download the extra packages from the Cloud Hosted Router section in Mikrotik.com/downloads
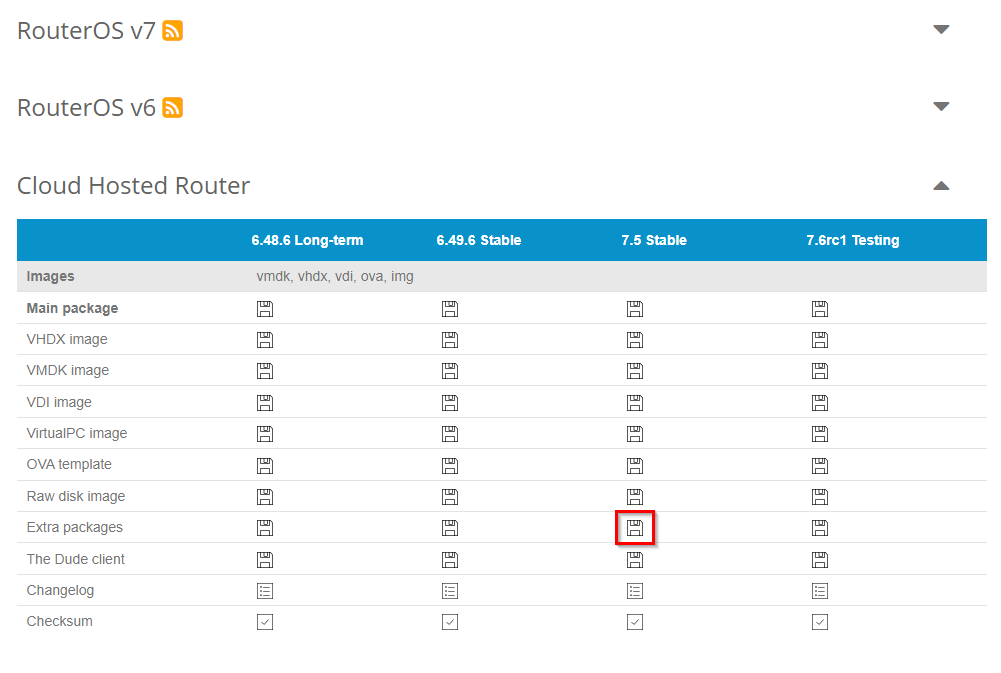
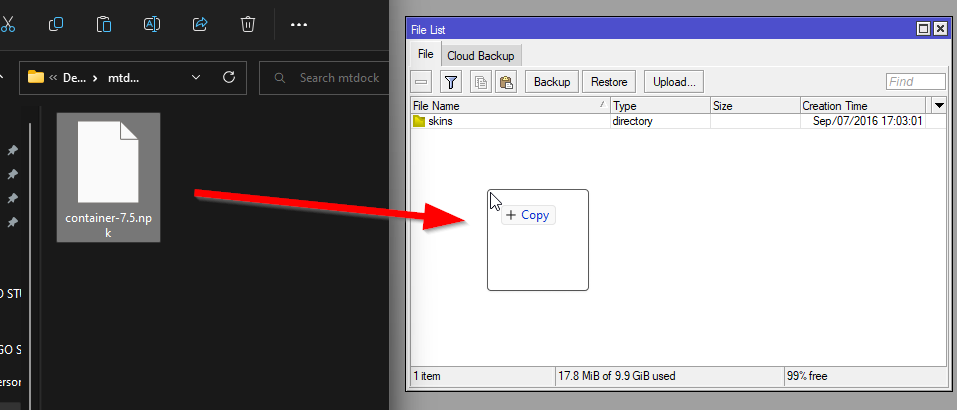
- Extract only the container-7.X.npk file and upload it to your CHR by dragging it and dropping it in the Files window in MikroTik Winbox.
- Reboot your router to install the container package.
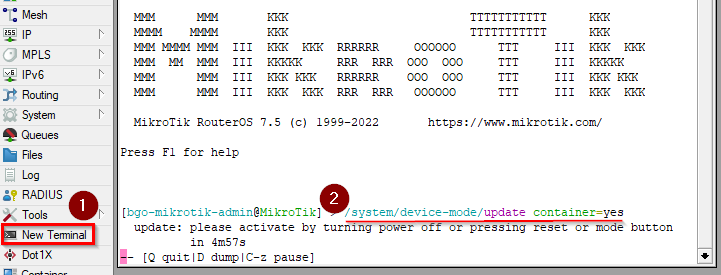
- Open a new terminal and enter /system/device-mode/update container=yes
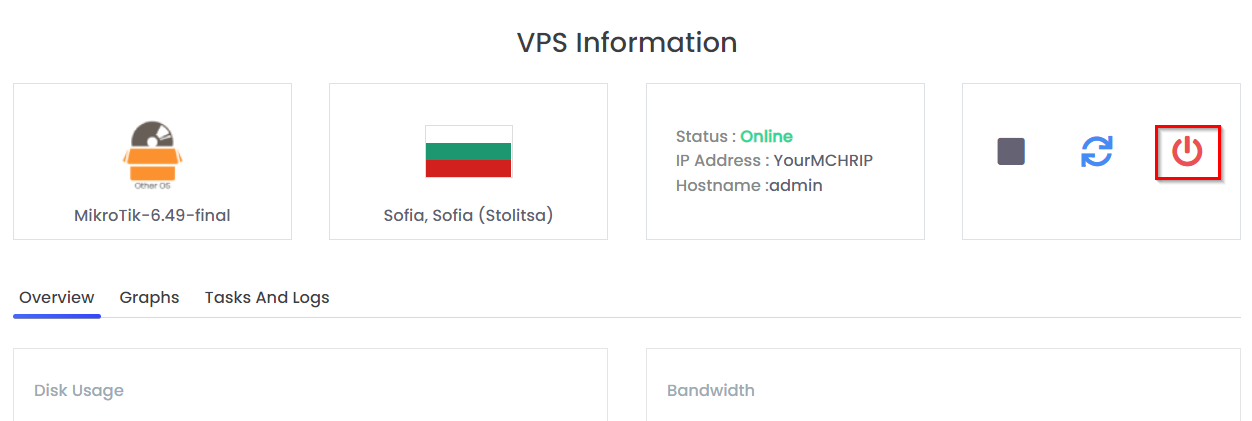
- Power off your CHR from the Client VPS Control panel and then start the CHR
- After containers are enabled, we will create another bridge by going to Bridge and clicking on “+”. Name it as you like and save it.
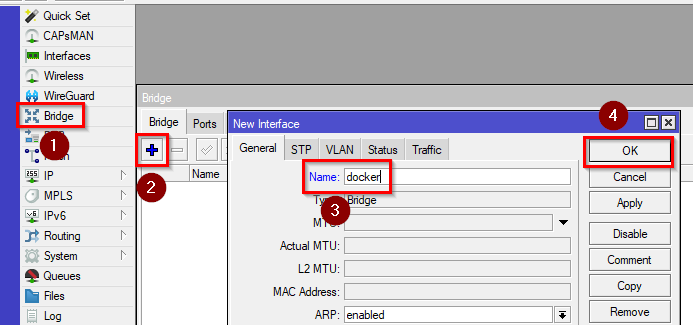
/interface/bridge/add name=docker
- Assign an IP address of your choice to that bridge by going to IP>Addresses and clicking on “+”. Enter the IP and select the bridge as the interface.
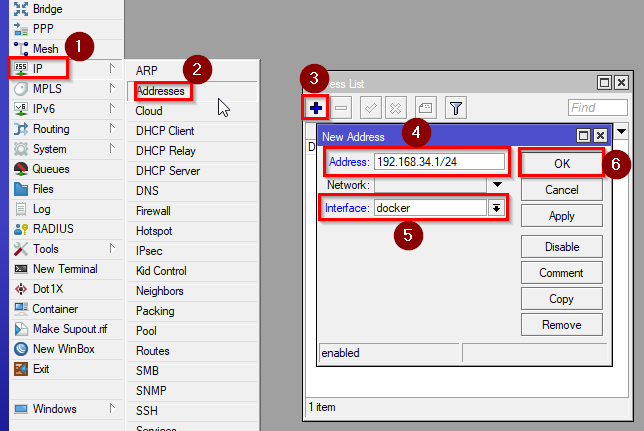
/ip/address/add address=192.168.34.1/24 interface=docker
- To allow internet access for our container instances, we will need to create a NAT rule in our Firewall. Go to IP>Firewall>NAT and click on “+”. Enter:
Chain: srcnat
Address: your subnet for your docker instances
action: masquerade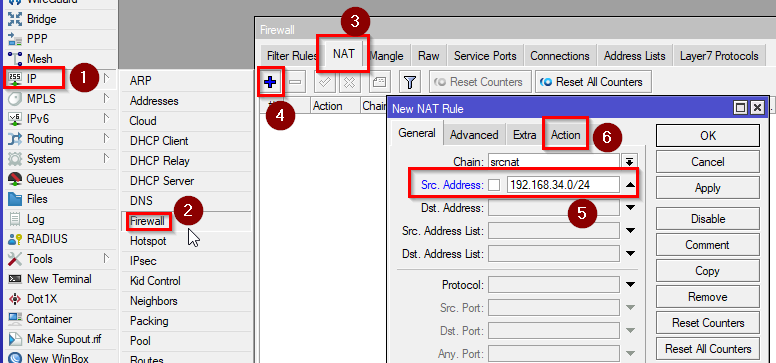
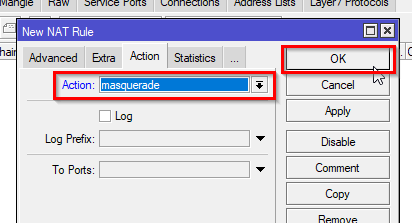
/ip/firewall/nat/add chain=srcnat action=masquerade src-address=192.168.34.0/24
- Configure the Docker container on MikroTik service by going to Container tab and clicking on “Config” Then set:
RAM High: Max ram usage in bytes, set 0 for unlimited, e.g. 200M = 200MB
Registry URL: https://registry-1.docker.io
Tmp dir: disk1/pull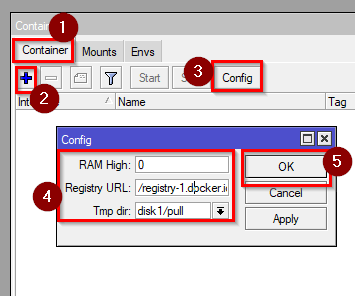
/container/config/set registry-url=https://registry-1.docker.io tmpdir=disk1/pull
Creating the first container – Pi-hole or AdGuard Home
- Now we will create a virtual Ethernet interface. Go to Interfaces>VETH and click on “+”. You can name it as you like. Enter a free IP address from the subnet (e.g. 192.168.34.2/24) and the bridge IP as a gateway.
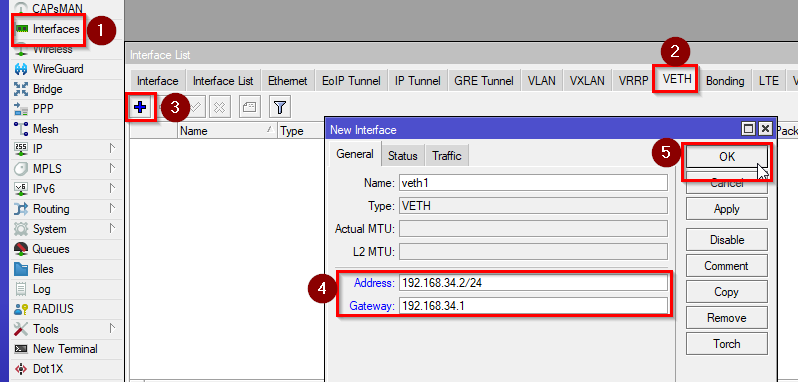
/interface/veth/add name=veth1 address=192.168.34.2/24 gateway=192.168.34.1
- Assign the newly created VETH interface to the bridge. Go to Bridge>Ports and click on “+”, then select the interface and the bridge.
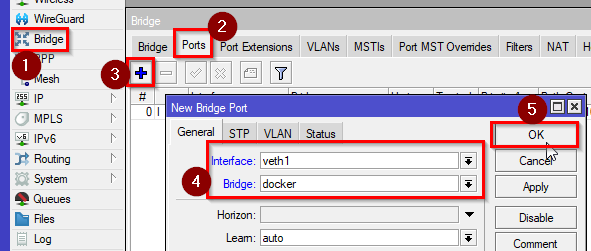
/interface/bridge/port add bridge=dockers interface=veth1
- To install Pi-hole, we will need to add some mounts and variables. Go to Container and add these mounts and envs
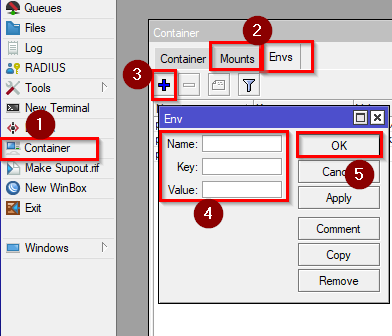
Envs:
Name=”pihole_envs” Key=TZ Value=”Europe/Sofia” (your timezone)
Name=”pihole_envs” Key=WEBPASSWORD Value=”yourpassword” (your password)
Name=”pihole_envs” Key=DNSMASQ_USER Value=”root” (root user for DNSMASQ)
Mounts:
Name=”etc_pihole” src=”disk1/etc” dst=”/etc/pihole”
Name=”dnsmasq_Pi-hole” src=”disk1/etc-dnsmasq.d” dst=”/etc/dnsmasq.d”/container/envs/add name=pihole_envs key=TZ value="Europe/Sofia"
/container/envs/add name=pihole_envs key=WEBPASSWORD value="yourpassword"
/container/envs/add name=pihole_envs key=DNSMASQ_USER value="root"
/container/mounts/add name=etc_pihole src=disk1/etc dst=/etc/pihole
/container/mounts/add name=dnsmasq_pihole src=disk1/etc-dnsmasq.d dst=/etc/dnsmasq.d
For AdGuard home, we will need to create just 2 mount points, the configuration will be done later after the installation.Mounts:
Name=”adguard-work” src=”/disk1/adguard-home/opt/adguardhome/work ” dst=”/opt/adguardhome/work”
Name=”adguard-conf” src=”/disk1/adguard-home/opt/adguardhome/conf ” dst=”/opt/adguardhome/conf”/container/mounts/add src=disk1/adguard-home/opt/adguardhome/work dst=/opt/adguardhome/work
/container/mounts/add name=adguard-conf src=disk1/adguard-home/opt/adguardhome/conf dst=/opt/adguardhome/conf - Now we will create the container, click on “+” and enter:
Remote Image: pihole/pihole:latest
Interface: veth1 (the virtual interface you created)
Envlist: pihole_envs
Root Dir: disk1/pihole
Mounts: etc_pihole and dnsmasq_pihole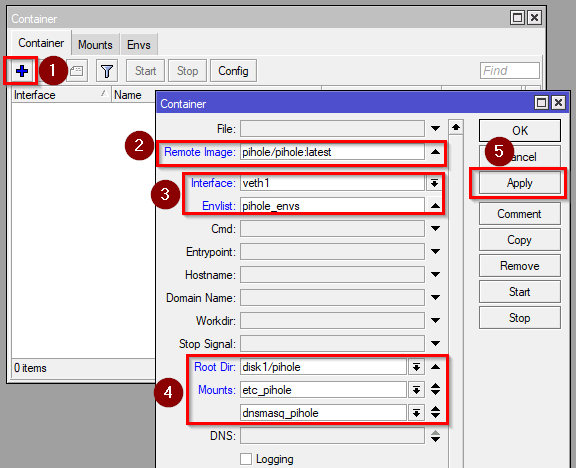
/container/add remote-image=pihole/pihole:latest interface=veth1 root-dir=disk1/pihole mounts=dnsmasq_pihole,etc_pihole envlist=pihole_envs
For Adguard Home, the configuration is similar:Remote Image: adguard/adguardhome:latest
Interface: veth1 (the virtual interface you created)
Root Dir: disk1/adguard-homeMounts: adguard-work and adguard-conf
/container/add remote-image=adguard/adguardhome:latest interface=veth1 root-dir=disk1/adguard-home mounts=adguard-work,adguard-conf
Then click apply and wait for the package to be downloaded and extracted. You can also use local uploaded images in .tar format.
- When the package is extracted, click on “Start” to run your container
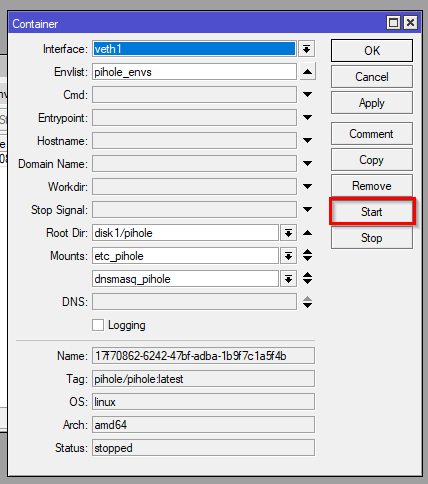
/container/start 0
Finalizing Pi-hole Installation
- To control Pi-hole, we will need to create a port forwarding rule in our Firewall. Go to IP>Firewall>NAT and click on “+”. Enter:
Chain: dstnat
Protocol: TCP
Dst. Address: address of your choice in your subnets or your CHR’s IP address.
Dst. Port: Port of your choice
action: dst-nat
To Addresses: Your docker container (virtual interface) IP address
To Ports: 80(HTTP)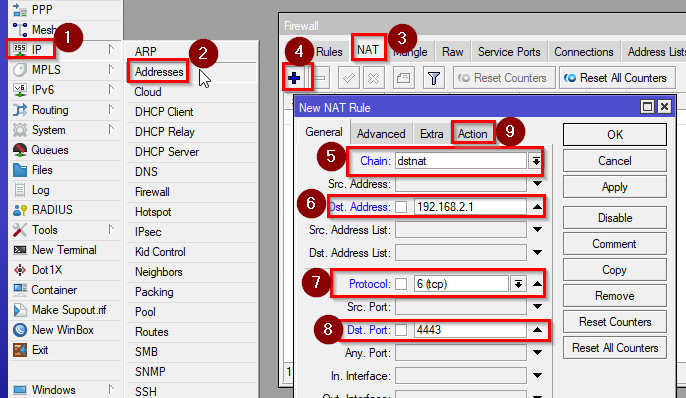
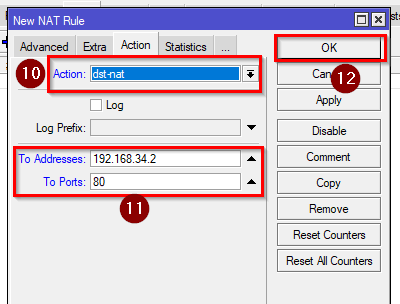
/ip firewall nat add action=dst-nat chain=dstnat dst-address=YourMCHRIP dst-port=PortOfYourChoice protocol=tcp to-addresses=192.168.34.2 to-ports=80
-
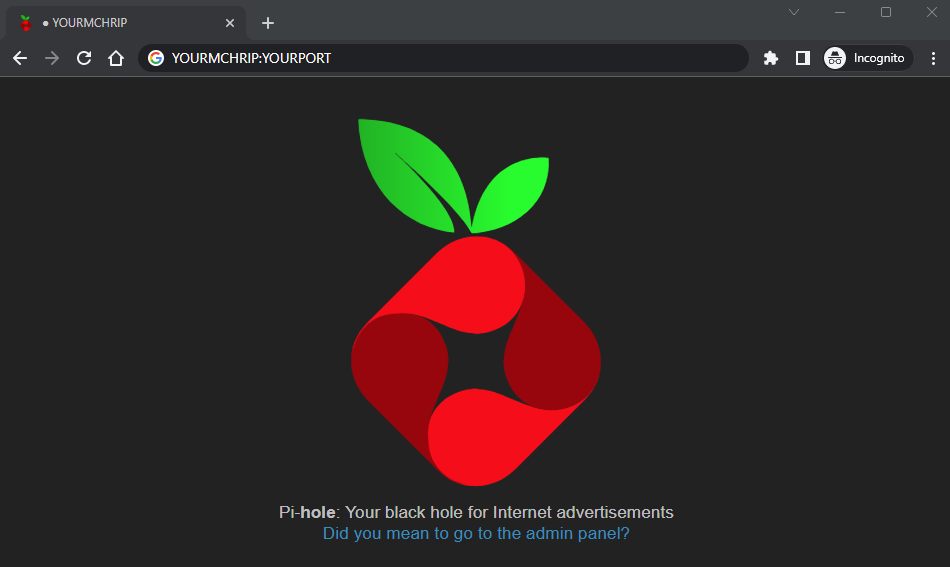
Enter the IP address and port in your browser and now you’re in your Pi-hole. Click on the link to enter the Admin Panel.
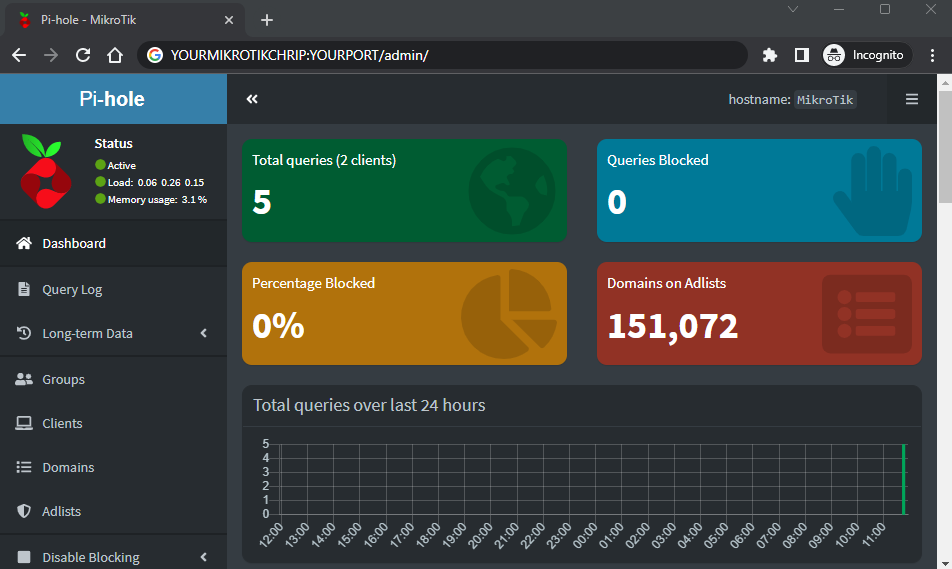
- Log in the admin panel. Your password is the value of the WEBPASSWORD ENV you set in step 12.

- And you’re done. Continue setting up Pi-hole with your favourite adblock lists.
Finalizing AdGuard Home Installation
Unlike Pi-hole, you will need to configure AdGuard Home by opening your browser and entering your VETH interface’s IP address, followed by port 3000.
e.g. 192.168.34.2:3000
Alternatively, if you plan to manage this server from outside your CHR network, you can create some port forwarding rules.
- Go to IP>Firewall>NAT and click on “+” and enter:
Chain: dstnat
Protocol: TCP
Dst. Address: your CHR’s IP address.
Dst. Port: Port of your choice
action: dst-nat
To Addresses: Your docker container (virtual interface) IP address
To Ports: 3000(HTTP)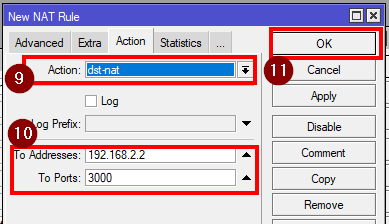
/ip firewall nat add action=dst-nat chain=dstnat dst-address=YourMCHRIP dst-port=PortOfYourChoice protocol=tcp to-addresses=192.168.34.2 to-ports=80
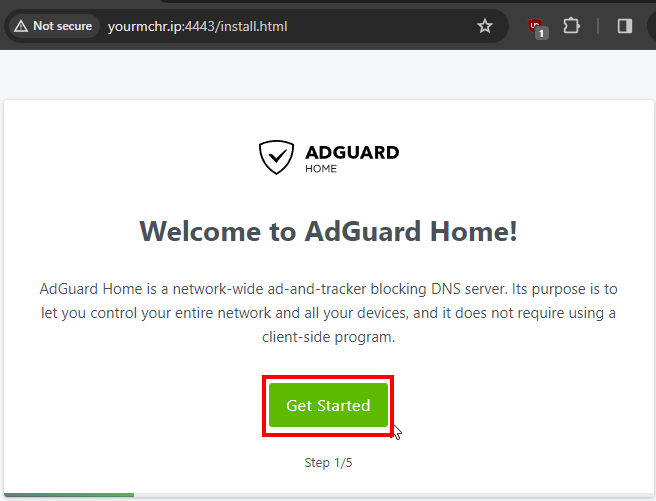
- Then go to your browser and enter Your CHR IP, followed by the port you’ve chosen, then click on “Get Started”
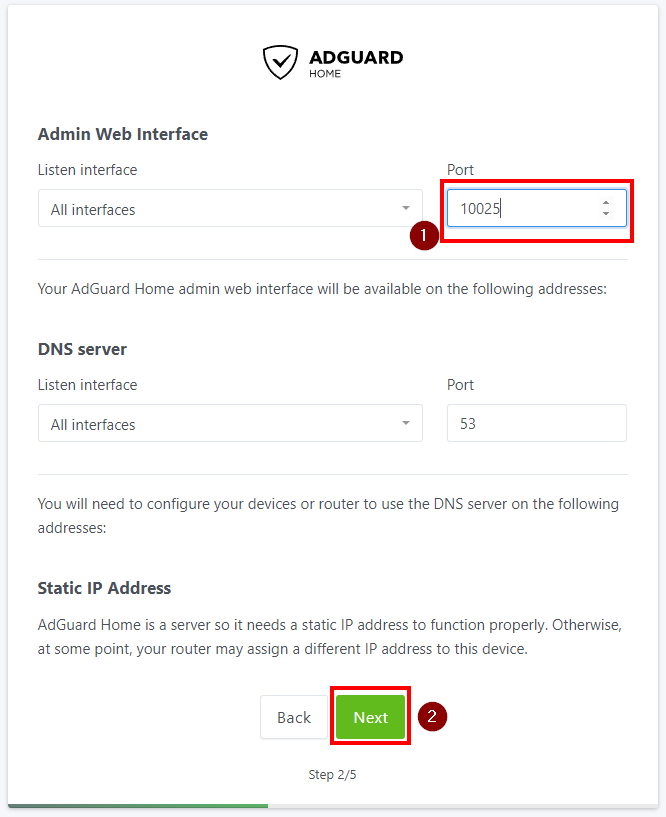
- On the second page you can choose on which port to access the admin web interface and click on Next. To use this DNS server from the whole network, we recommend leaving everything else with its default values.
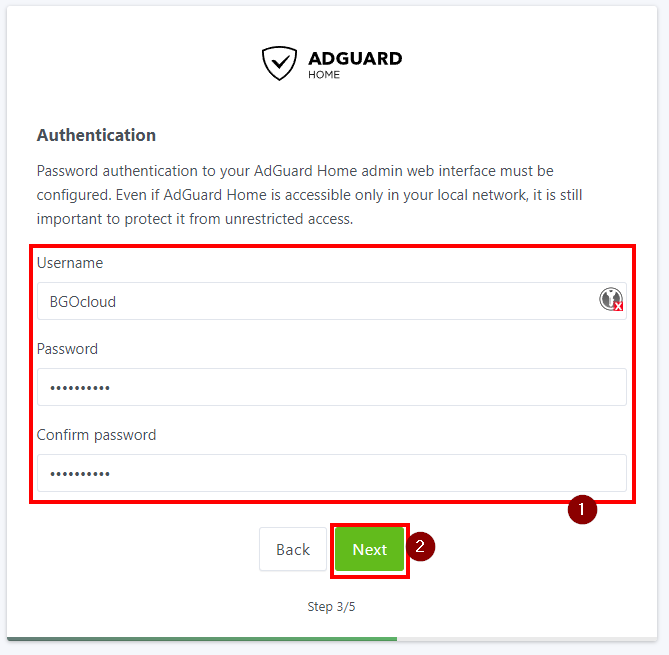
- On the third page you need to set username and password for the admin account. Enter them and click on Next once more.
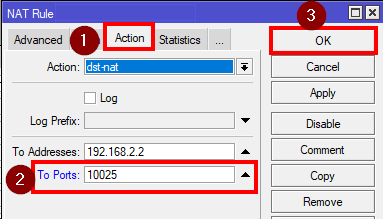
- The fourth and fifth page are the instructions on how to set up AdGuard Home on different devices. You can skip them. Go to the NAT rule and change the To-ports from 3000 to the chosen port in the previous step.
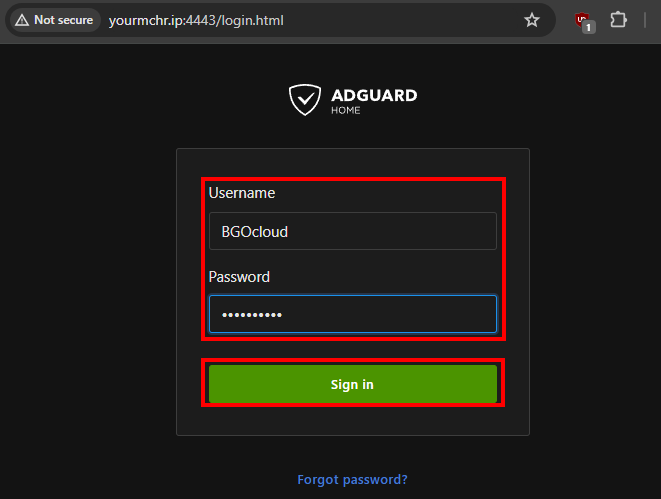
- After that, refresh the page on your browser and you will be redirected to the admin web interface, there enter the credentials you’ve provided and click on “Sign in”.
And that’s it, AdGuard Home is ready to receive DNS requests from your devices. Continue configuring it by adding your favourite blocklists and enabling different protections.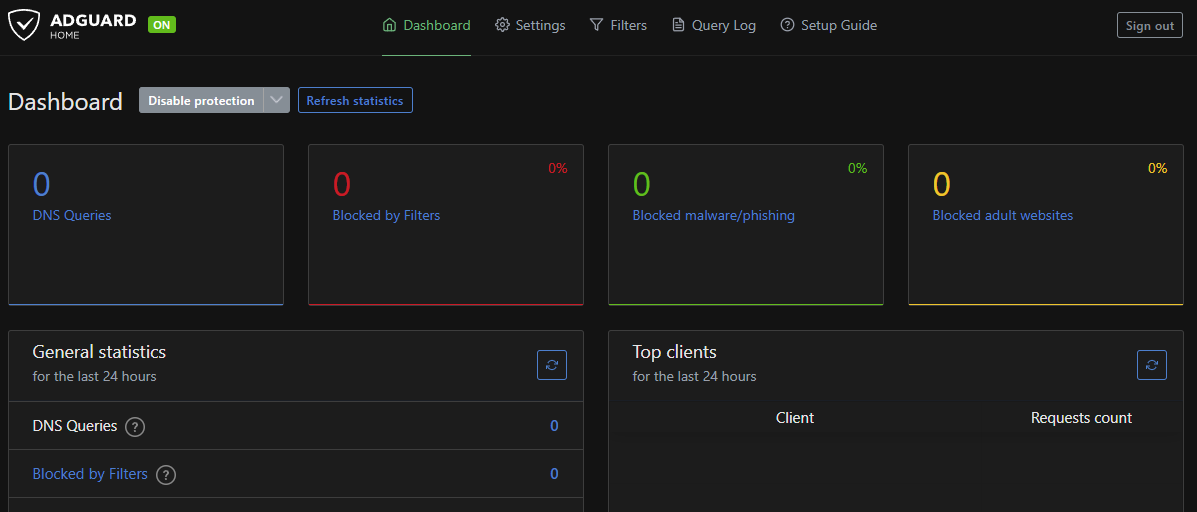
Changing the DNS server to the new AdGuard Home / Pi-hole Installation
Click on IP>DNS and set the docker container (virtual interface) IP address as the DNS server.
/ip dns set servers=192.168.34.2
In case you have any questions, do not hesitate to contact us.