
Setup Secure VPN access between client and server
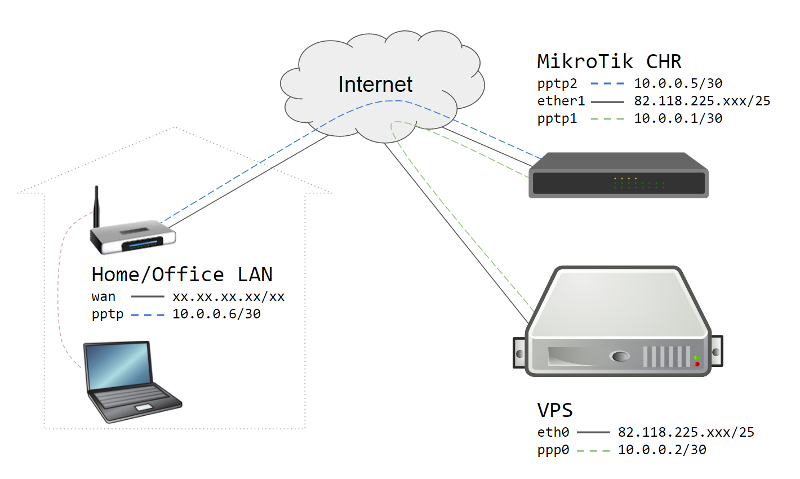
This guide will describe one of the many possible usages of MikroTik CHR and Virtual Private Server (VPS).
Topic: Windows Client establish secure connection to Debian server over VPN, managed by MikroTik CHR
Requirements for this setup:
- One MikroTik CHR instance
- One Debian VPS
One Windows based client computer
Description: CHR will serve as firewall and VPN concentrator. It has local connectivity to Debian VPS, which is completely secure due to the cloud environment. The server connects to the VPN server over PPTP and the new tunnel will be used to route all the traffic to and from the server. Default GW on the server is changed to be served by the VPN over the tunnel.
The client’s computer also connects to the VPN over PPTP, and gains access to the server’s resources.
All connections are managed on the CHR and could be filtered very tightly to rise the security level.
Step-by-Step:
1. Purchase MikroTik CHR
2. Purchase VPS with Debian 8
3. Connect to the CHR using WinBox and set username and password as soon as possible! (You can download WinBox from HERE)
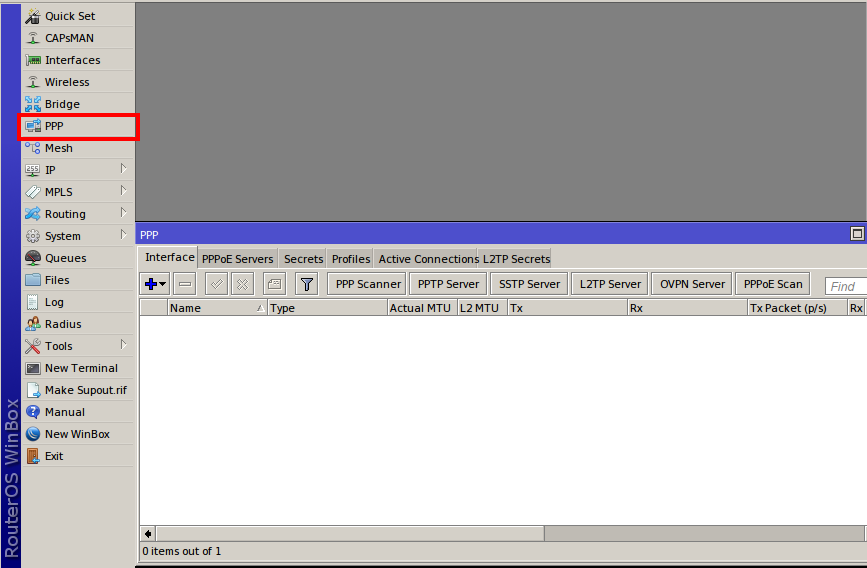
4. Click - PPP
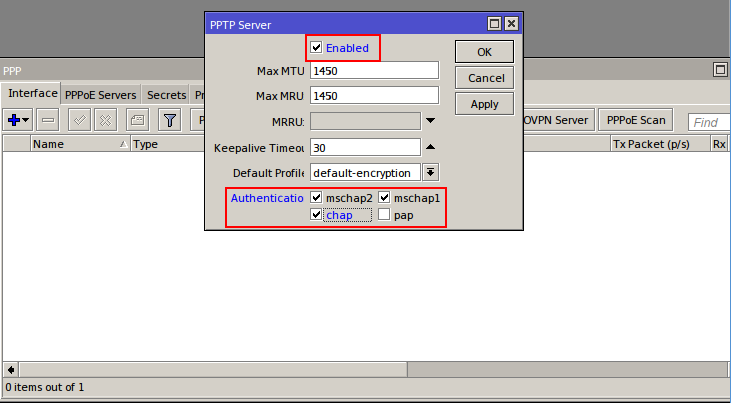
5. Click - PPTP Server button and check “Enabled” box and “chap” as authentication method
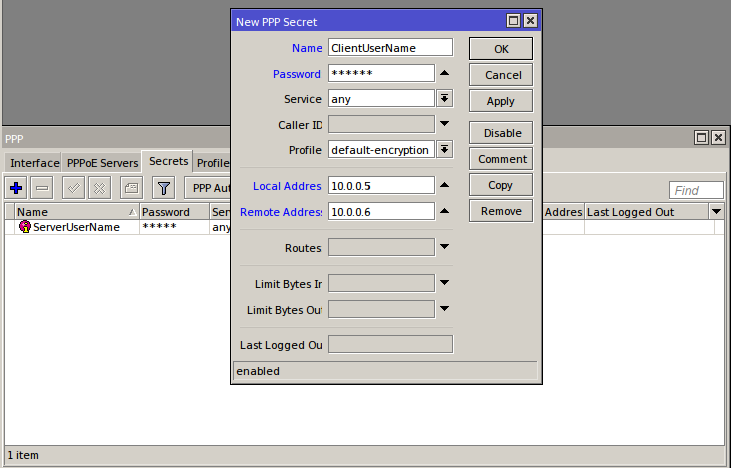
6. Go to “Secrets” tab and click Add “+” button
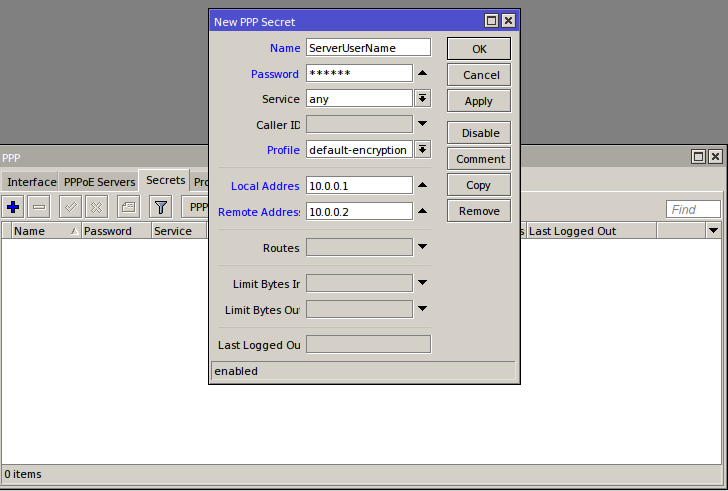
7. On Name, define the username of the server.
- On password, set a strong, non-dictionary password (may use https://strongpasswordgenerator.com/)
- Change Profile to: default-encryption
- On Local address enter: 10.0.0.1 (this will be the default Gateway of the server)
- On Remote address enter: 10.0.0.2 (this will be the address that server will use for all communications)
- Click OK to apply and save the new profile.
8. Add another profile as the above for the client connection as shown in the picture.
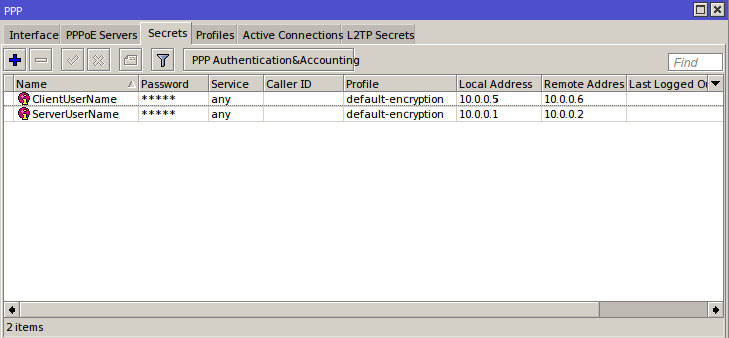
9. After finish creating profiles, review the settings
Initial setup of the MikroTik is done, now proceed with the server configuration:
Note: All commands are executed as root
10. Connect to the server (Debian) using SSH
11. Install PPTP client
# apt-get update
# apt-get install pptp-linux
12. After installation is finished run the setup as shown, replacing variables as they are in your set-up. # pptpsetup --create ppp0 --server YourVPNIPHere --username ServerUserName --password 12345 --start --encrypt
13. Check if the connection is successful by running the following command:
# tail /var/log/messages | grep ppp
Example output:
Oct 20 09:14:39 debian-server pppd[2734]: pppd 2.4.6 started by root, uid 0
Oct 20 09:14:39 debian-server pppd[2734]: Using interface ppp0
Oct 20 09:14:39 debian-server pppd[2734]: Connect: ppp0 <--> /dev/pts/0
Oct 20 09:14:40 debian-server pppd[2734]: CHAP authentication succeeded
Oct 20 09:14:40 debian-server pppd[2734]: MPPE 128-bit stateless compression enabled
Oct 20 09:14:41 debian-server pppd[2734]: local IP address 10.0.0.2
Oct 20 09:14:41 debian-server pppd[2734]: remote IP address 10.0.0.1
14. To make the new connection start with the system boot: - Open "interfaces" file:
# nano /etc/network/interfaces
- Check if the option for eth0 is set to auto, it should look like this:
auto eth0
iface eth0 inet static
….
- Delete the line that contains a gateway
- Append this in the end:
auto ppp0
iface ppp0 inet ppp
provider ppp0
15. Make a script to add default route through the PPTP Connection
- Open new file for edit, which is named to represent its content
# nano /etc/ppp/ip-up.d/vpn1-route
- Inside add the routes you want like this:
#!/bin/bash
route add default gw 10.0.0.1 dev ppp0
- Save the file
- Make it executable:
# chmod +x /etc/ppp/ip-up.d/vpn1-route
That’s all to configure on the server and the router sides. Now reboot the server. Note: After the reboot, there will be no connection to the server outside the VPN. To access it again You must be connected to the VPN Server.
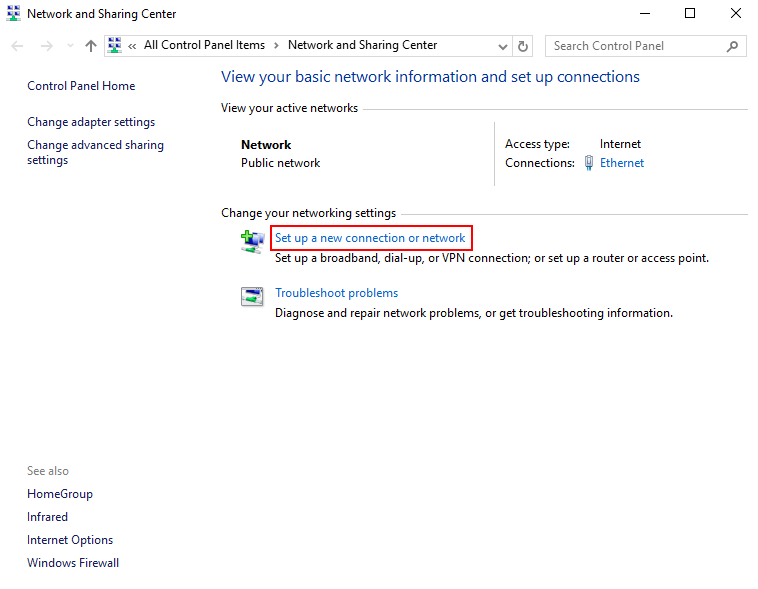
Now let's setup PPTP VPN on Windows 10 Client PC:
1.Open control panel and go to “Network and Sharing Center”
2.Click “Set Up a New Connection or Network”
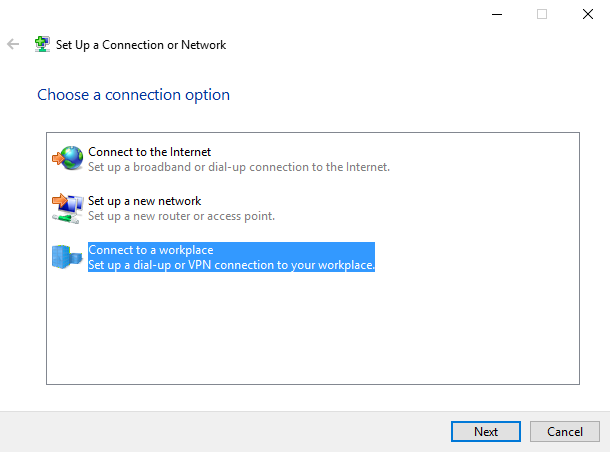
3.Click “Connect to a workplace”
4.Click “Use my Internet connection (VPN)”

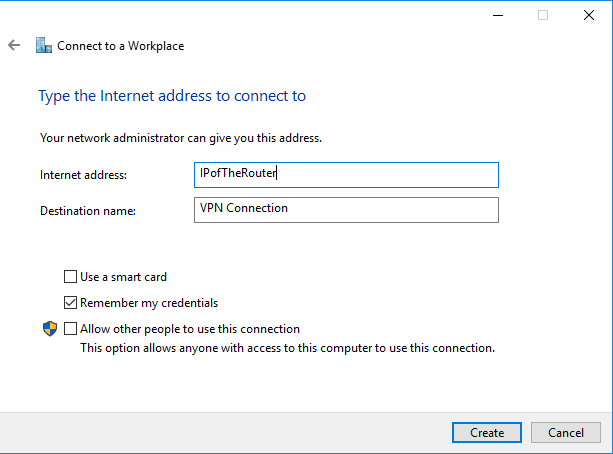
5.On Internet address: type the real IP address of the VPN router, on Destination name, Alias name of your choice, then click Create
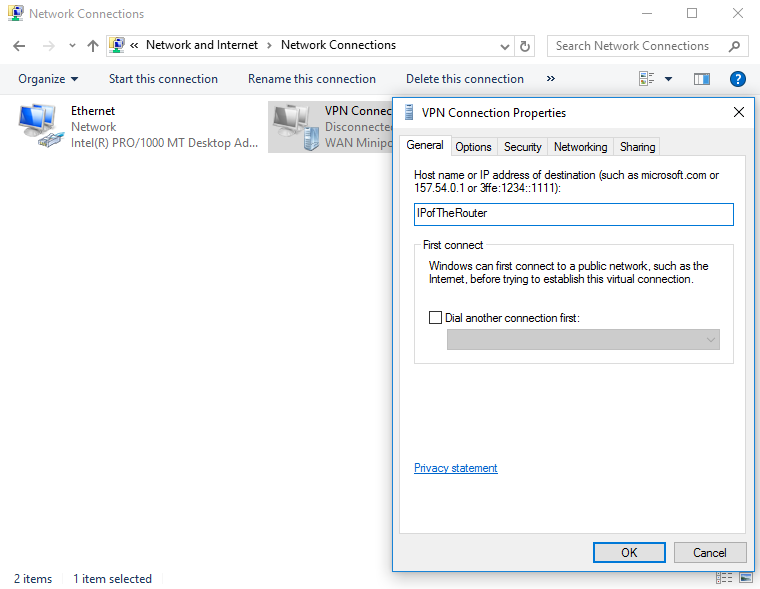
6.Next right-click on the icon of the new connection and open Properties
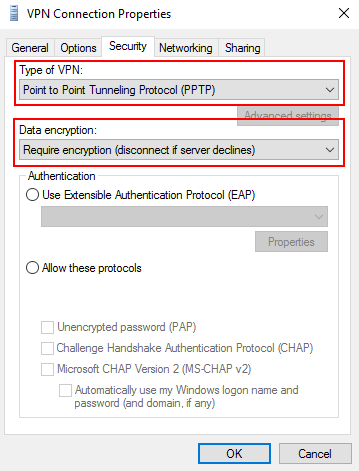
7.Go to “Security” tab, Change the “Type of VPN” to PPTP, and “Data encryption” to “Require encryption”
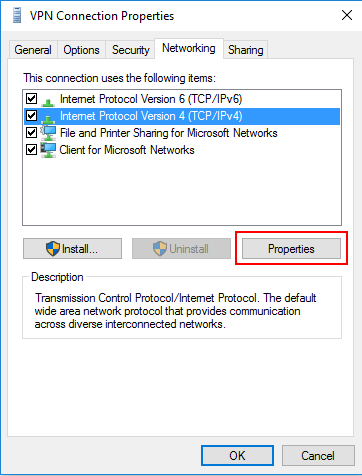
8.Go to “Networking” tab, select “Internet Protocol Version 4” and click Properties, then Advanced
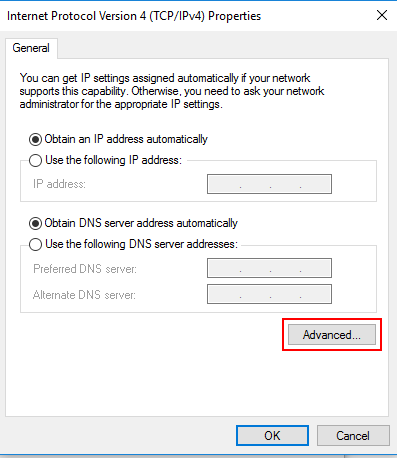
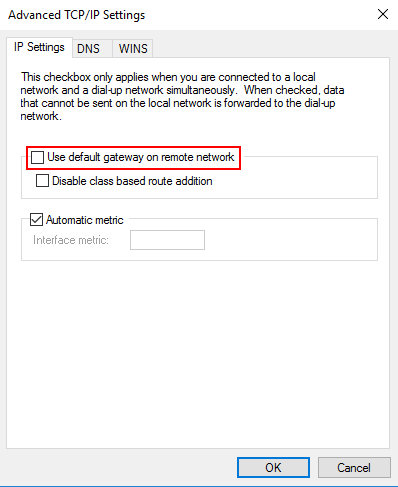
9.Uncheck “Use default gateway on remote network” and click OK
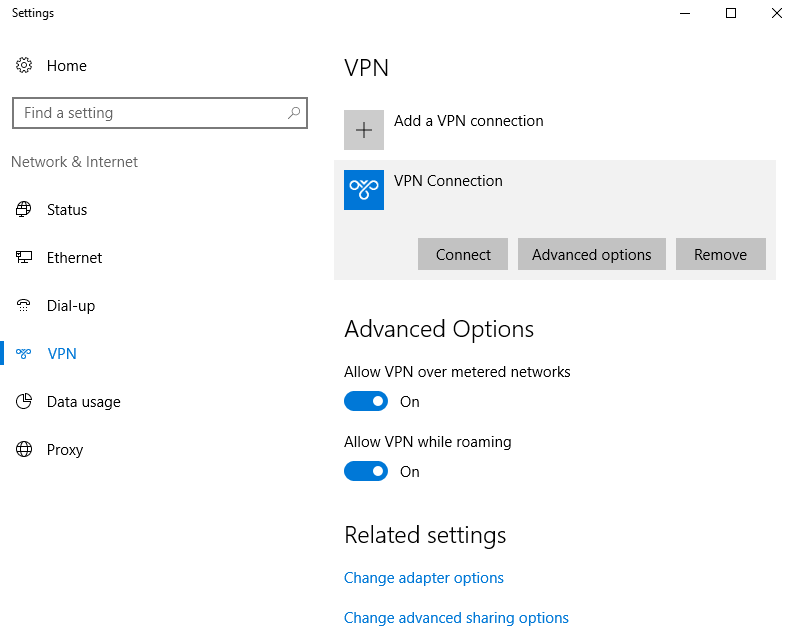
10. When double click the connection, the VPN screen is shown. Select your new connection and click Connect.
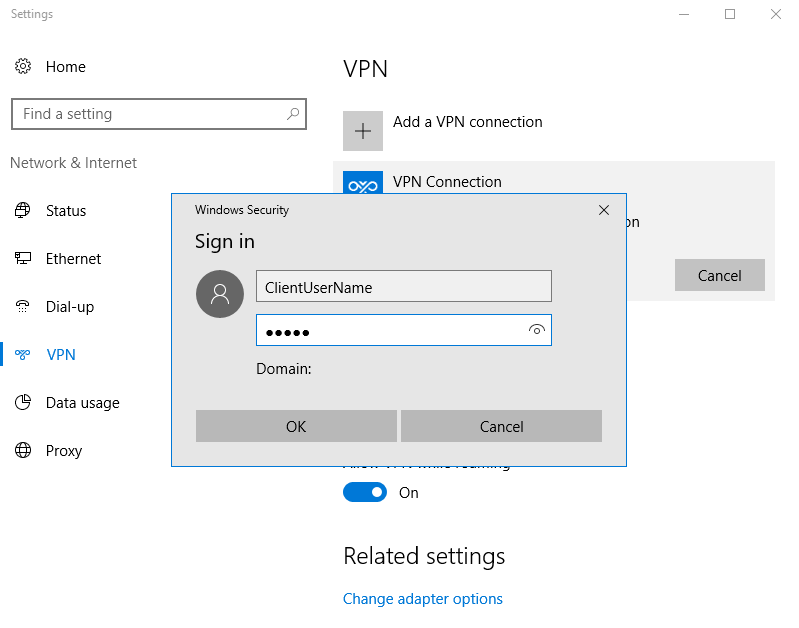
11. In the pop-up, type-in the credentials you set in the VPN Router and click OK.
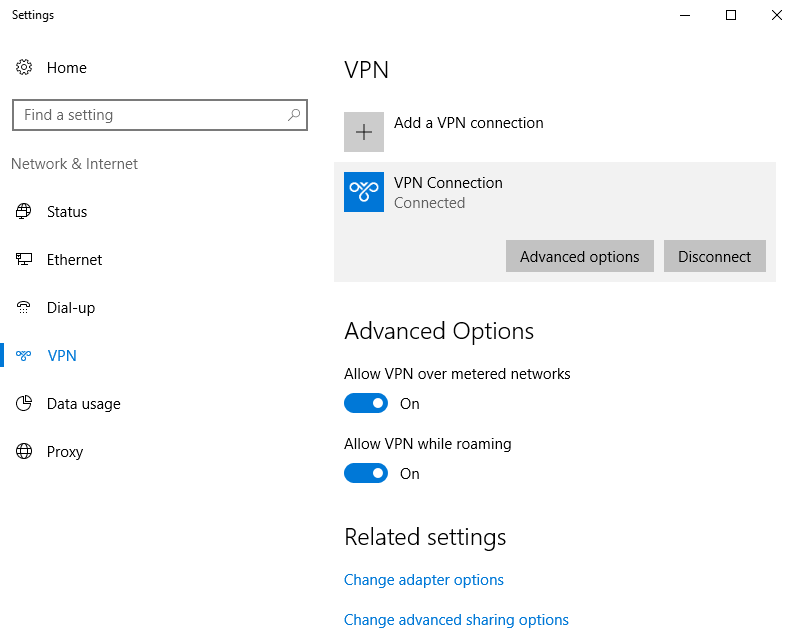
12. You are now connected
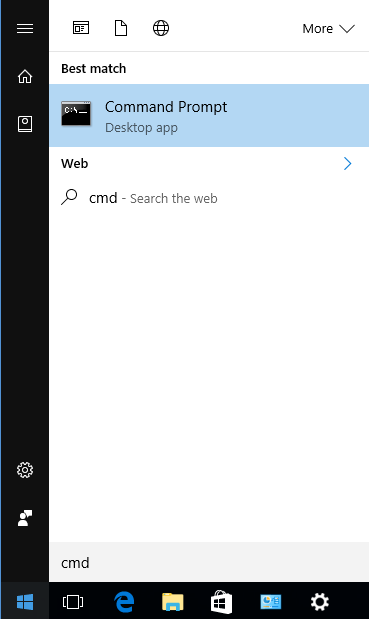
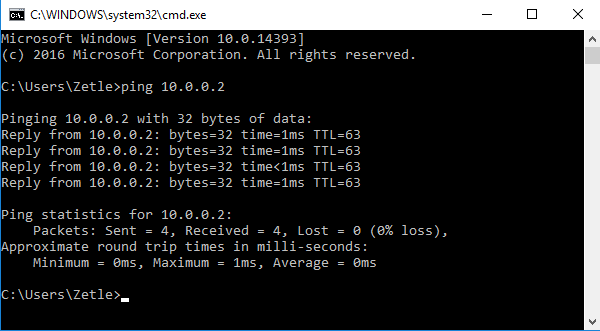
13. Check the connectivity between Windows Client and the Server over the tunnel: Click on start menu, type “cmd” and press Enter. In the Command prompt try to ping the VPN IP address of the server: ping 10.0.0.2
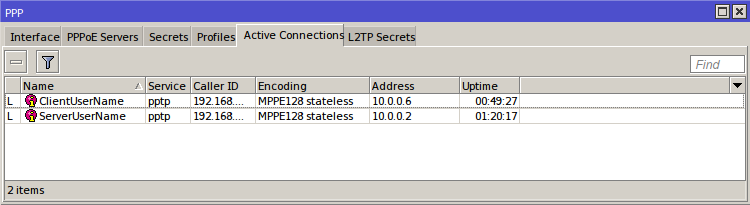
I. You can monitor the status of the VPN connections in the MikroTik CHR:
II. If something has gone wrong and You can’t see the server over the tunel, use the VNC Console in the client area.
III. This is basic setup guide! You MUST take care of securing the MikroTik using appropriate Firewall rules.